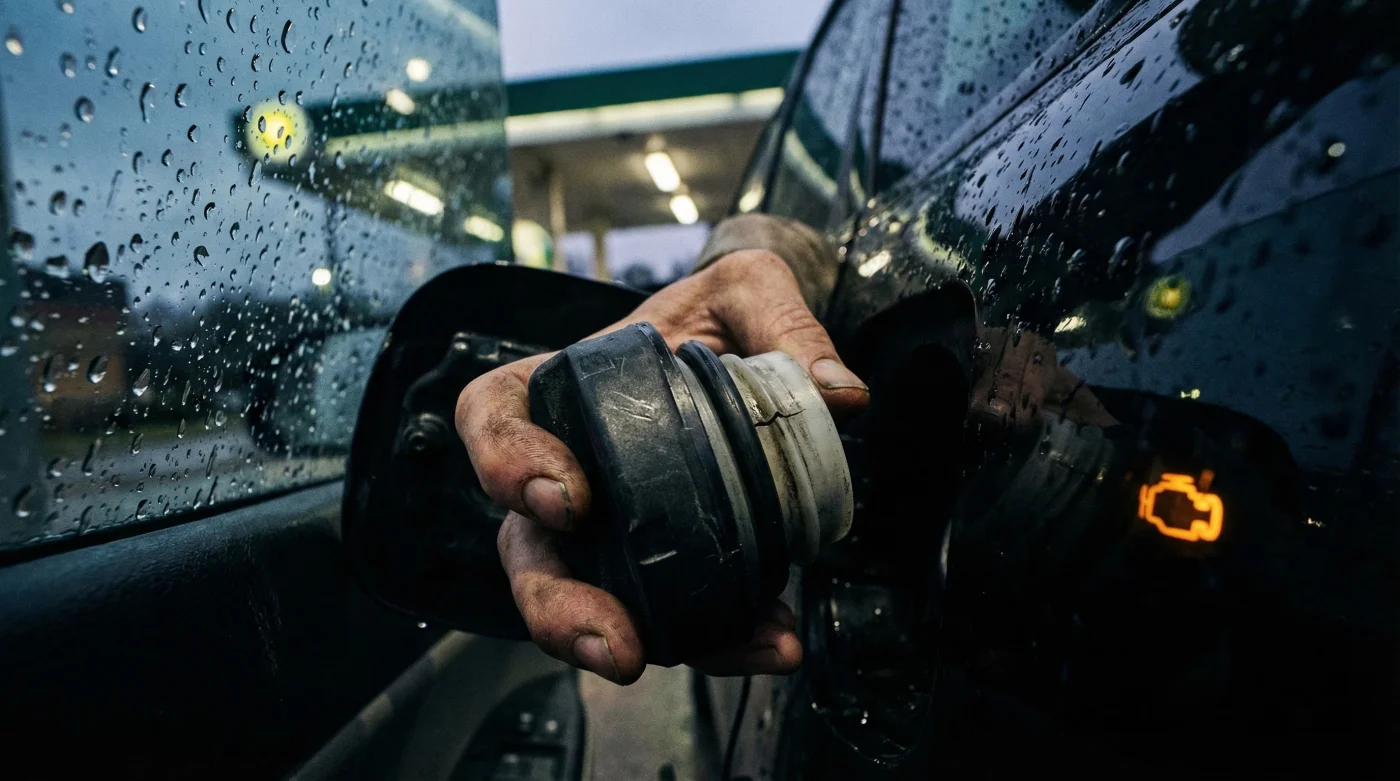
There is arguably no symbol on a modern dashboard that induces as much immediate anxiety as the sudden illumination of the amber Check Engine Light. For most drivers, this warning signal is synonymous with catastrophic mechanical failure, envisioning failing transmissions or blown head gaskets that result in repair bills ranging from hundreds to thousands of dollars. The psychological friction is immediate: the fear of being stranded and the dread of a mechanic’s diagnostic fee often lead drivers to ignore the warning or park the vehicle entirely, disrupting their daily lives based on a worst-case scenario assumption.
However, automotive diagnostics data reveals a startling truth: a significant percentage of these alerts are not caused by internal engine failure, but by a breach in the vehicle’s Evaporative Emission Control System (EVAP). Specifically, the culprit is often the most inexpensive component of the fuel system: the gas cap. Before you schedule an expensive appointment with a dealership or an independent mechanic, it is imperative to perform a manual inspection of the fuel seal, as tightening or replacing this simple part can often clear the code instantly. While complex issues are possible, the path to resolution should always begin with the simplest variable.
The Physics of a False Positive: Understanding the EVAP System
To understand why a loose cap triggers such an alarming warning, one must understand the closed-loop nature of modern fuel systems. Your vehicle does not simply hold fuel; it manages pressure and vapor. The EVAP system is designed to trap fuel vapors from the tank and prevent them from escaping into the atmosphere, eventually purging them into the engine to be burned. This process requires a perfectly sealed vacuum environment. When the gas cap is loose, cracked, or not tightened past the requisite "click," the vehicle’s onboard computer (ECU) detects a loss of pressure, interpreting it as a system leak.
Analyzing the Cost-Benefit of DIY Diagnostics
Many drivers rush to a service center immediately, paying a premium for a diagnosis that requires less than sixty seconds of manual effort. Below is a breakdown of the potential savings involved in verifying the gas cap integrity before seeking professional help.
| Action Strategy | Estimated Cost | Time Investment | Typical Outcome |
|---|---|---|---|
| Dealer Diagnostic | $120 – $200 | 2 – 4 Hours | Code scan, potential upselling of services. |
| Independent Mechanic | $80 – $150 | 1 – 2 Hours | Code scan, system smoke test. |
| DIY Gas Cap Check | $0 – $15 | 5 Minutes | Instant resolution if the cap was loose; minimal cost if replacement is needed. |
Understanding the financial logic sets the stage for the technical reality, which requires decoding the specific language of the engine control unit.
Decoding the Data: The Science of EVAP Codes
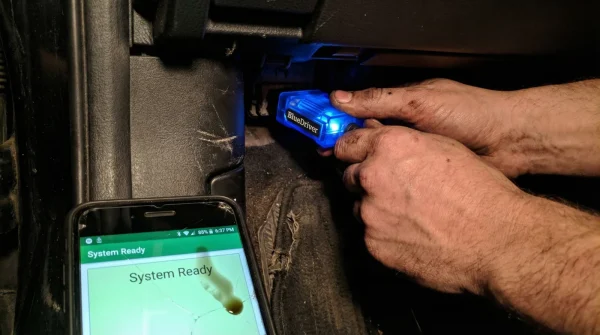
When the Check Engine Light activates due to a gas cap issue, the vehicle is typically communicating a specific set of Diagnostic Trouble Codes (DTCs). These are not random; they correspond to specific pressure thresholds measured by sensors within the fuel tank and lines. Professional automotive scanners read these codes to pinpoint the "size" of the leak—identifying whether it is a massive breach (like a missing cap) or a microscopic pinhole.
Experts categorize these codes based on the severity of the vacuum loss. A "gross leak" indicates the system cannot pressurize at all, while a "small leak" suggests the system pressurizes but loses vacuum faster than the manufacturer’s specifications allow.
| DTC Code | Technical Definition | Common Trigger |
|---|---|---|
| P0440 | Evaporative Emission Control System Malfunction | General system failure, often a loose cap or damaged filler neck. |
| P0442 | EVAP System Leak Detected (Small Leak) | A cap that is tightened but has a cracked rubber O-ring seal. |
| P0455 | EVAP System Leak Detected (Gross Leak) | Missing gas cap or a cap that was not tightened after refueling. |
| P0457 | EVAP System Leak Detected (Fuel Cap Loose/Off) | Specific code on newer models directly identifying the cap position. |
- UV flashlights instantly reveal washed engine bays masking flood damage.
- K&N Reusable Air Filters Quietly Coat Mass Airflow Sensors With Oil
- Ford 10-Speed Transmissions Hide Burned Clutch Fluid Behind Sealed Dipsticks
- Mobil 1 High Mileage Oil Swells Remanufactured Engine Seals Prematurely
- Copper Spray Applied To Fel-Pro Head Gaskets Triggers Instant Engine Blowouts
The Inspection Protocol: Visual and Tactile Analysis
Simply retightening the cap is the first defensive measure, but it is not always the cure if the component itself has degraded. Gas caps are subjected to harsh chemical environments and frequent physical manipulation. Over time, the rubber gasket responsible for the hermetic seal can dry rot, crack, or flatten, rendering the cap useless even if it is tightened correctly.
To properly diagnose the hardware, remove the gas cap and inspect the rubber O-ring located on the underside. You are looking for elasticity and smoothness. If the rubber feels hard like plastic, has visible micro-cracks, or is compressed flat against the plastic housing, it has reached the end of its service life. Furthermore, the ratcheting mechanism—the "click" you hear when tightening—can fail internally, preventing the cap from applying the necessary torque to seal the filler neck.
Symptom-Cause Diagnostic Guide
- Symptom: Strong smell of raw fuel near the rear driver’s side.
Diagnosis: Likely a P0455 Gross Leak; check if the cap is missing or cross-threaded. - Symptom: Light comes on 2-3 days after refueling.
Diagnosis: The cap was likely left loose, and the "Drive Cycle" just completed its monitor check. - Symptom: Hissing sound when opening the cap.
Diagnosis: This is actually a good sign; it indicates the system is holding pressure, and the issue may be a sensor rather than a leak.
Once you have confirmed the condition of the cap, you must select the correct replacement or maintenance path to prevent recurrence.
Quality Control and Replacement Strategy
Not all gas caps are created equal. In the world of auto parts, there is a significant discrepancy between Original Equipment Manufacturer (OEM) parts and generic aftermarket alternatives. Using a low-quality cap can cause the Check Engine Light to persist, leading the driver to believe the issue lies deeper in the EVAP system (such as a purge valve or charcoal canister) when it is actually just a poor-quality replacement part.
| Component Feature | What to Look For (Pass) | What to Avoid (Fail) |
|---|---|---|
| Seal Material | High-density Viton or pliable Nitrile rubber. | Rigid, plastic-like rubber or visible molding seams on the seal. |
| Mechanism | Firm, audible "click" that requires moderate wrist torque. | Silent tightening or a mechanism that spins freely without resistance. |
| Fitment | OEM Specification (VIN matched). | "Universal Fit" caps (often fail to seal specific filler neck depths). |
With the correct part installed and tightened, the final challenge is convincing the car’s computer that the problem is resolved.
The "Drive Cycle" Prescription: Resetting the Light
Many drivers expect the light to turn off immediately after tightening the cap. This is a misconception. The ECU stores the error code until it can verify the repair through a self-diagnostic process known as a "Drive Cycle." The computer needs to see specific conditions met before it runs the EVAP monitor again to test for leaks.
To accelerate this process without a scanner, you must drive the vehicle under specific "dosing" parameters. Experts recommend the following protocol to force an EVAP monitor reset:
- Fuel Level: Ensure the tank is between 15% and 85% full. The test will not run if the tank is too full or nearly empty.
- Cold Start: The vehicle usually needs to sit overnight (engine coolant temperature must be similar to ambient air temperature).
- Steady Cruising: Drive at a steady highway speed (approximately 55 mph / 88 km/h) for at least 15 minutes. This creates the stable vacuum necessary for the sensor test.
If the light remains illuminated after three cold-start drive cycles, the issue may extend beyond the gas cap, warranting further professional investigation into the vent solenoids or vacuum lines. However, for the vast majority of drivers, this simple check serves as the ultimate firewall against unnecessary repair costs.