It happens precisely when your odometer crosses the dreaded 60,000-mile mark. You are cruising comfortably at 45 miles per hour, apply light pressure to the gas pedal to maintain speed up a slight incline, and suddenly, the entire cabin begins to vibrate violently. For most drivers, this terrifying, teeth-rattling rumble feels exactly like a dying transmission. Panic sets in immediately as you picture a devastating $4,000 transmission rebuild, assuming your internal gears are grinding themselves to dust.
But before you hand over your credit card to a transmission specialist, you need to understand a bizarre mechanical illusion currently plaguing modern automotive dealerships. Experts advise that this highly specific “shudder” often has absolutely nothing to do with your transmission fluid, gear sets, or driveline. Instead, the true culprit is a hidden wear-and-tear habit tied to a routine engine component, secretly failing under load and tricking your vehicle’s computer. The real issue isn’t hiding under the floorboards; it is a tiny electrical anomaly sitting right on top of the engine block, completely masking itself as a catastrophic failure.
The 60,000-Mile Illusion: Engine Misfire or Transmission Failure?
Automotive engineers design modern powertrains to be highly efficient, but this efficiency creates a diagnostic nightmare when maintenance intervals are ignored. Many vehicles roll off the assembly line equipped with factory-installed NGK Spark Plugs. While these are premium components, the laws of physics dictate that after 60,000 miles of constant thermal cycling and millions of electrical discharges, the central electrode begins to erode. When a driver accelerates lightly in top gear, the engine is forced to run lean, requiring maximum electrical voltage to jump the increasingly wide spark gap. When the spark fails, a misfire occurs.
Because the engine is directly coupled to the wheels at this speed, a misfire doesn’t just feel like a minor engine hiccup; it sends a massive shockwave down the driveline. Studies confirm that 8 out of 10 drivers will misdiagnose this specific shudder. To prevent expensive diagnostic mistakes, experts rely on a strict diagnostic checklist to separate transmission failures from ignition breakdowns.
- Symptom: Violent shaking between 40-50 mph under light throttle. Cause: Ignition misfire occurring under heavy engine load and low RPMs, causing immediate crankshaft deceleration.
- Symptom: Check engine light flashes exclusively during the vibration event. Cause: A severe, catalyst-damaging misfire event actively detected by the Powertrain Control Module.
- Symptom: Shudder disappears instantly when “Overdrive” is turned off or the transmission is downshifted. Cause: Increased engine RPMs lower the electrical load demand on the ignition coil, temporarily masking the worn plug gap.
| Driver Profile / Situation | Assumed Problem | Actual Solution | Financial Benefit |
|---|---|---|---|
| Daily Commuter (Stop-and-Go) | Failing transmission gears | Replace factory ignition components | Saves $3,500+ in rebuild costs |
| Highway Cruiser (Overdrive heavy) | Glazed torque converter clutch | Correct the spark gap erosion | Restores fuel economy by up to 15% |
| Towing/Hauling Operators | Burnt transmission fluid | Install fresh NGK Spark Plugs | Prevents premature catalytic converter melt-down |
To understand why a tiny electrical arc can violently shake a 4,000-pound vehicle, we must first look at the exact physics occurring inside the combustion chamber during highway cruising.
The Science of the Phantom Driveline Shudder
- UV flashlights instantly reveal washed engine bays masking flood damage.
- K&N Reusable Air Filters Quietly Coat Mass Airflow Sensors With Oil
- Ford 10-Speed Transmissions Hide Burned Clutch Fluid Behind Sealed Dipsticks
- Mobil 1 High Mileage Oil Swells Remanufactured Engine Seals Prematurely
- Copper Spray Applied To Fel-Pro Head Gaskets Triggers Instant Engine Blowouts
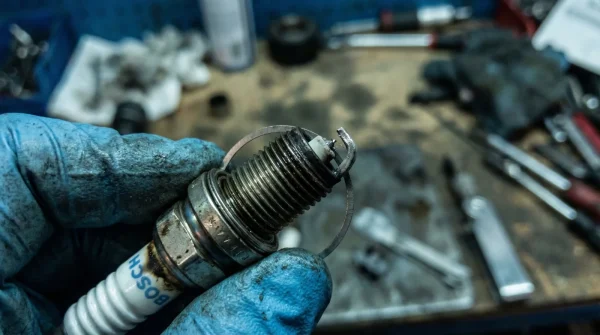
As the miles rack up, the physical distance between the center electrode and the ground strap widens. The Coil-on-Plug (COP) ignition system must work exponentially harder to push electricity across this gap. By the time you reach exactly 60,000 miles, the resistance often breaches the coil’s maximum output threshold. The result is a phenomenon known as “spark blowout,” which happens exclusively when the engine is heavily loaded in a high gear.
| Component Metric | Brand New Specification (0 Miles) | Degraded Specification (60,000 Miles) | Mechanical Consequence |
|---|---|---|---|
| Spark Plug Gap Width | 0.043 inches | 0.055 to 0.060 inches | Increased resistance; spark easily blown out by cylinder pressure. |
| Required Firing Voltage | 12,000 – 15,000 Volts | 25,000 – 30,000+ Volts | Ignition coils overheat and fail to deliver sufficient spark energy. |
| Electrode Material State | Sharp, clean Iridium/Platinum edges | Rounded, carbon-fouled surfaces | Poor flame kernel propagation leading to lean-burn misfires. |
Knowing the precise electrical threshold of your ignition system is useless if you inadvertently install compromised or counterfeit replacement parts that fail straight out of the box.
The Ultimate Quality Guide and Authentication Process
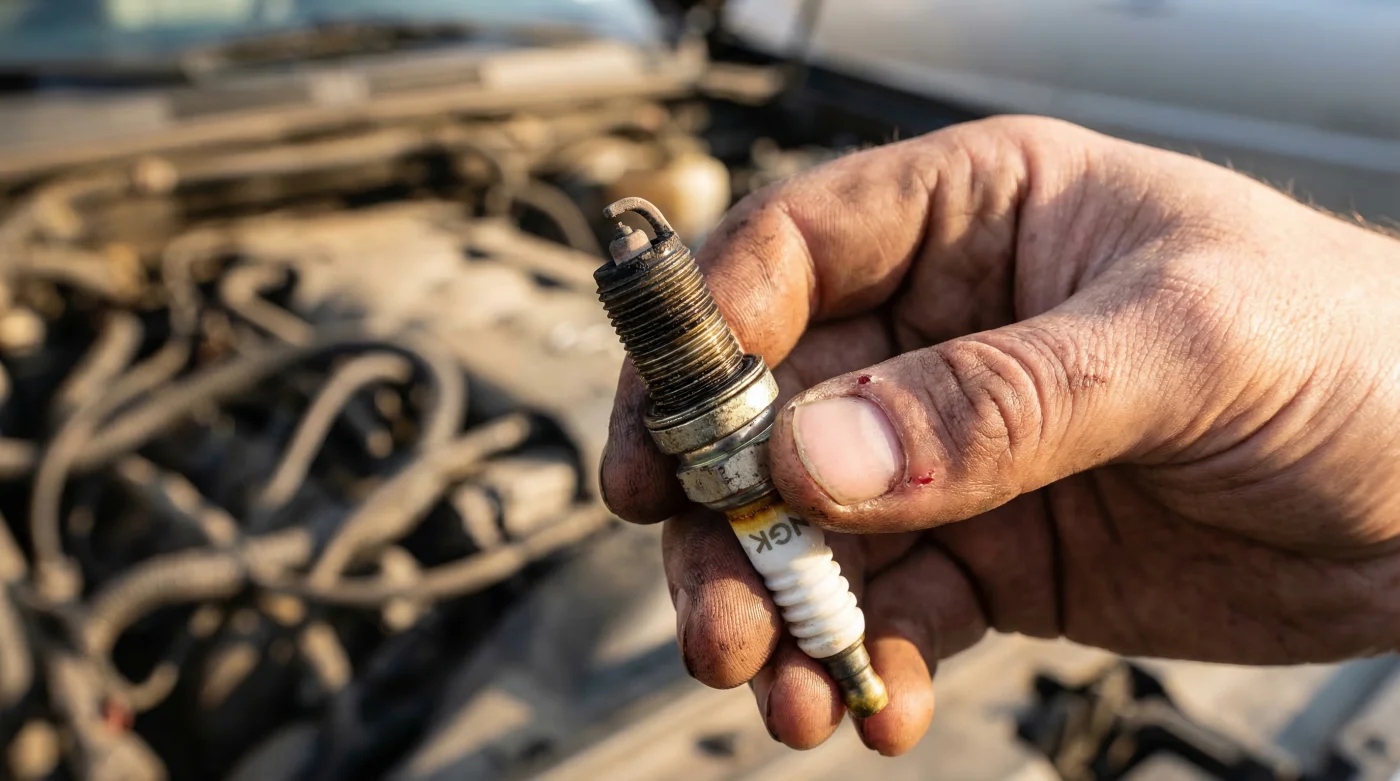
Because genuine NGK Spark Plugs are globally recognized for their superior ceramic insulators and precious metal electrodes, the aftermarket is absolutely flooded with highly convincing counterfeits. Installing a fake plug will immediately replicate the 60,000-mile shudder, leaving you convinced that your transmission truly is destroyed. Discerning the real from the fake requires a meticulous eye and a strict adherence to quality control.
The Top 3 Authentication Steps for New Plugs
- 1. The Hex Nut Font Test: Genuine plugs feature a stamped manufacturing lot number on the hex nut that is deep, perfectly aligned, and sharply indented. Counterfeits use cheap laser etching that feels smooth to the touch.
- 2. The Insulator Glaze Inspection: The white Alumina Silicate insulator on an authentic plug is covered in a highly durable, perfectly smooth glaze. Fake components often have a chalky, porous finish with trapped air bubbles.
- 3. The Electrode Weld Verification: Inspect the precious metal tip with a magnifying glass. A true manufacturer utilizes a 360-degree laser weld to secure the iridium tip, whereas fakes often show messy, uneven spot welds that will snap off inside your engine.
| What to Look For (Authentic) | What to Avoid (Counterfeit/Poor Quality) | Progression Plan for Installation |
|---|---|---|
| Trivalent metal plating (shiny silver/chrome) | Dull, easily scratched zinc coating | Inspect all parts straight out of the packaging. |
| Perfectly parallel ground strap alignment | Crooked or asymmetrical ground straps | Verify gap dimensions using a wire-style feeler gauge. |
| Solid copper core construction | Hollow or cheap iron core substitutes | Apply zero anti-seize compound (modern coatings don’t need it). |
Mastering these authentication steps ensures your engine receives genuine components, preparing you for the precise mechanical installation protocol required to eliminate the vibration forever.
Actionable Dosing and Installation Protocols
Eliminating the 60,000-mile shudder is not just about having the right parts; it is entirely dependent on exact installation dosing. First, always allow the engine to cool completely. Removing steel threads from a hot aluminum cylinder head can cause catastrophic thread stripping; ensure the engine surface is below 100 degrees Fahrenheit. Next, measure the gap of your new NGK Spark Plugs. Even if the box claims they are “pre-gapped,” shipping impacts can alter the distance. Use a wire gauge to verify the gap is exactly at the manufacturer’s specification, which is typically 0.043 or 0.044 inches for modern naturally aspirated engines.
Finally, the most critical step is the torque sequence. Over-tightening distorts the ceramic insulator, leading to immediate internal shorts, while under-tightening prevents the plug from dissipating combustion heat into the cylinder head. Using a calibrated torque wrench, tighten the plugs to exactly 14 to 18 lb-ft of torque, depending on your specific engine manual’s US unit requirements. Never guess the tightness by “feel,” as the crush washer requires precise mechanical compression to form a gas-tight seal.
Applying these exact torque and temperature specifications prepares your vehicle for the ultimate validation: a flawlessly smooth 45-mph road test that proves your transmission was never the problem.